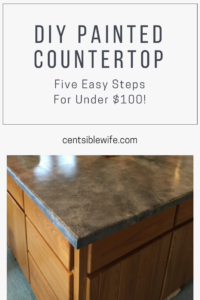
I’ve been mulling around the idea of a blog for years now and even before we had website, logo, or tagline, I already knew that I wanted to share my Giani DIY countertop with you! This is by far my favorite DIY project. Why? Because anyone can do it. Even if you’re not an avid DIY-er or painter, you can rock the countertop paint!
My husband and I started house hunting 3 years ago and I quickly came to realize that DIY projects would be in our future. Not everybody has the same taste and I wanted to make the home feel like ours. Also, our budget was not extensive, so I knew I couldn’t purchase my “dream home”. I had to create it.
One of the things I immediately detested when I first entered our soon to be home was the countertops. They were seafoam green. Along with the carpet. Everywhere I looked I saw seafoam green! I’m sure it was lovely back in the 80s or 90s but it was 2016 and I knew it had to go.
Believe it or not, the carpet was livable to me because of how light it was but I knew I did not want to live with the hideous laminate countertops. But new countertops were not in the budget because along with a down payment we also had to fork out $7500 for a new septic system. There went my reno money…down the toilet. Literally.
So, I started researching DIY countertop. I instantly fell in love with the idea and started to do some research on cost, quality, and feasibility. While I love concrete countertops, those take a bit more planning and a lot of work. So, I opted for painting.
I read countless reviews on the top DIY countertop paint kits and opted for Giani. The reviews I read were great, the price was right, and after watching a few videos, I decided that it was manageable!
I’m so excited to finally share this project with you and show you how this paint completely transformed my kitchen!
In order to create the look that I did, I bought the “Giana Countertop Paint Kit, White Diamond” (click link to view in Amazon!). It’s under $100, which is a steal for the way it transforms your kitchen! The steps are simple, with clear labels indicating each step, which makes it well worth the price!
Let me take you on a brief tour of my project and the final product!
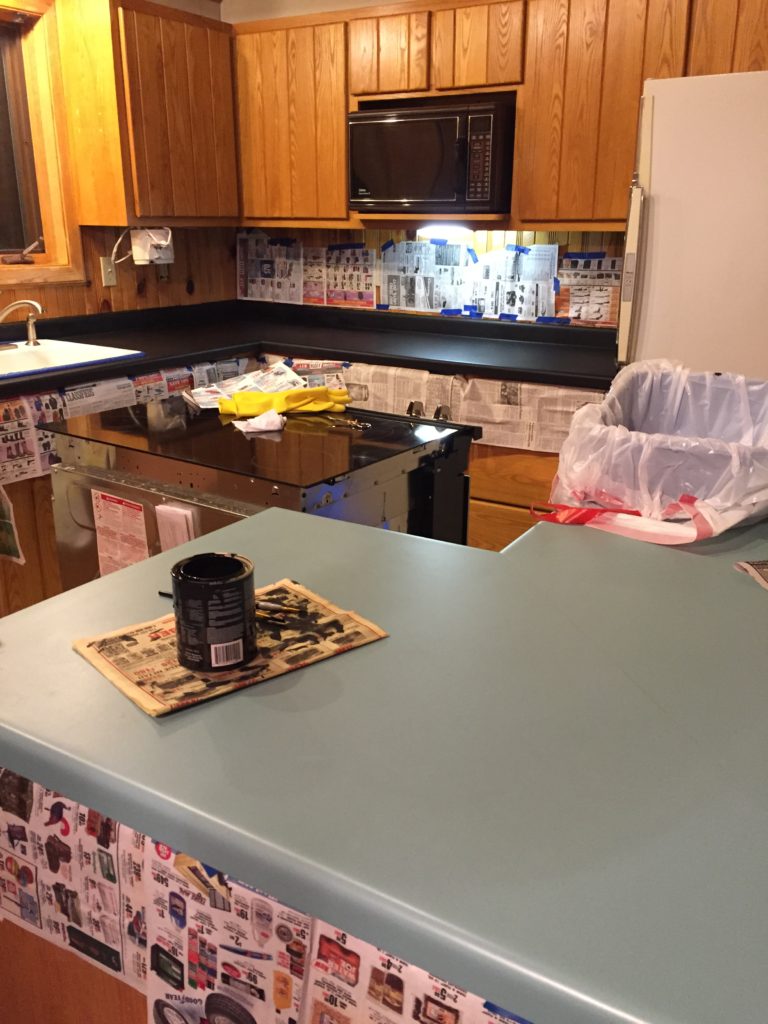
First off, isn’t the seamfoam color lovely?! I actually didn’t even take an official “before” picture because I was so excited to cover it up!
NOTE: Giani recently updated the paint that they include in the kit so you counter will likely look slightly different than mine. They updated the paint to cover better, allowing for less coats to cover the primer. Just be aware of this as you might not need as much paint as I did to cover! To reflect these changes, I’ve added both names into the title of the steps so that you can follow along no matter which kit you have.
Step #1
The first step in this process is to prime your countertop black! This took me completely off guard, but I didn’t regret covering up that seafoam green for even a second! I just put up newspaper (as you can see) in order to avoid getting paint on the cabinets. PS those are my next DIY project!
This step is a breeze. The kit came with a roller and primer, so away we went! It was done within 1.5 hours. It can get slightly time-consuming around the trim but if you tape, it’d be a breeze.
Step #2
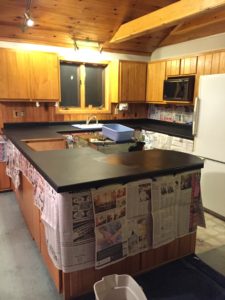
The next step was to take the paint can labeled “2a Pearl Mica or GreyStone” and sponge it on. I knew I didn’t want my counters too dark so I needed a heavy coat of this to cover the black. They recommend sponging the entire coat, but it was taking too much time. So instead, I rolled a light layer over the counter and then sponged on top in order to give it the depth and sponged look versus looking rolled on.
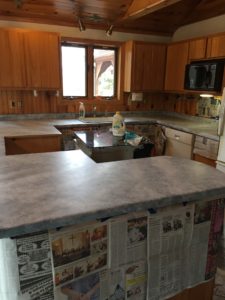
It’s very important to work in sections. You want the countertop to a look like natural granite so having the “waves” is vital to achieving this look. It will create depth if you have these “waves” with some looking lighter and darker than others.
If you’re unsure what I mean by “waves” take a look at the picture and see how there are curvy sections that look lighter than others.
Step #3
The next step is to take your sponge and sponge on “Step 2B, Inca Gold or Quartzite”. I found that this gold added a lot to the color and make it look more like realistic granite and less like sponged on paint! So don’t skip this step!
Step #4
The next step is to take the can labeled “Step 2c, White Limestone” and sponge that over the gold. Again, remember to work in waves in order to create the same effect I did with mine.
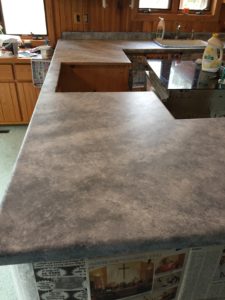
Step #5
The next step was to create “cracks and veins” by using a small paintbrush and painting them on with the leftover black primer. Guys, I tried this initially, it looked ridiculous! I gave it a good stab but in the end, I ended up going back to step one and priming over the entire section. Please learn from my mistake and either avoid this step or just commit to a small section to test it, versus half of your counter!
Step #6
The last step is to roll on your topcoat. I did three layers of the topcoat in order to create the shine that I desired. I also wanted to ensure that my topcoat would withstand wear and tear, which is another reason for adding three coats.
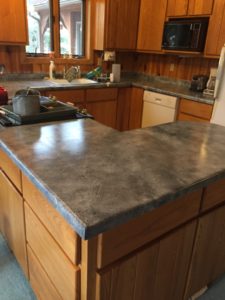
I found the topcoat of the countertop to be the most difficult. It dried quickly so I had to work ever quicker in order to complete my section or it would leave streaks where my roller overlapped. These streaks went away upon adding another layer of topcoat so I got some practice! If you look closely when the sun is hitting it just right, you can see some minor streaks in this coat. But a minor annoyance versus looking at those seafoam green counters every day!
This coat was the one that smelt the strongest in my opinion. However, the smell is minimal for the whole project. I’ve heard of other kits where the odors caused headaches and required well vented areas. This kit is nothing like that and merely smells like your typical can of paint.
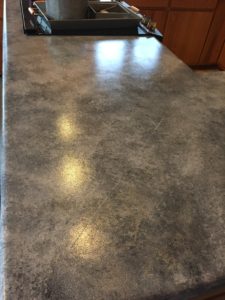
My DIY countertop has been in my kitchen for two years now so I’m excited to provide you with an update on how they are standing up to the wear and tear. I’m happy to say they still look great! There are a few spots that need some touching up after two years but I can easily do that with the leftover paint I have. Couple things to note about wear and tear:
1. Do not use a magic eraser on the paint. While it didn’t take all of the paint off, it did dull it. I believe it stripped it of the topcoat and maybe the top layer of paint.
2. Tomato products stain it red. However, give it a little time and a few washes with dish soap and water and it will go away. No need for a harsh cleaner.
3. I’ve never used a harsh cleaner on the counter (besides the magic eraser). I simply clean the countertop with hot water and dish soap.
4. The only spot that appears to be “chipping” is around the sink. I’m uncertain if this is typical or if it has to do with the fact that my husband was unaware that there was an art to removing painters tape in order to avoid ripping off paint. I definitely think this affected the sealing of the paint and overall quality. I do plan on touching up that area too but honestly, even after 2 years of some minor chipping, you can’t tell unless you get close to it. And because of that, it’s not priority!
5. I haven’t noticed any scratching of the paint with dragging objects but I believe I’m more naturally careful, knowing its paint. That being said, I think I’m the only one in this household who “takes it easy” on the counters so they have withstood a significant amount of wear and tear over the two years.
Would I do it again? Absolutely. In a heartbeat and without hesitation! I’ve been absolutely thrilled with the way they have turned out. I would strongly recommend this product as well! I have heard of other brands chipping away after just a few short months, leaving the homeowners with a mess to clean up. Giana Countertop Paint is high quality and I’m confident that you will be satisfied with it as well.
Questions? I would be happy to answer any questions you have about your DIY countertop paint!